Yay! The Borrani wheels are back and are all shiny now!
Nice job done by Ash's Spoked Wheels
Saturday, August 25, 2012
Sunday, June 24, 2012
Of frames and engines...
Well, this has been a positive weekend for Project Crossbow and all the hard working staff (ie. me, haha!).
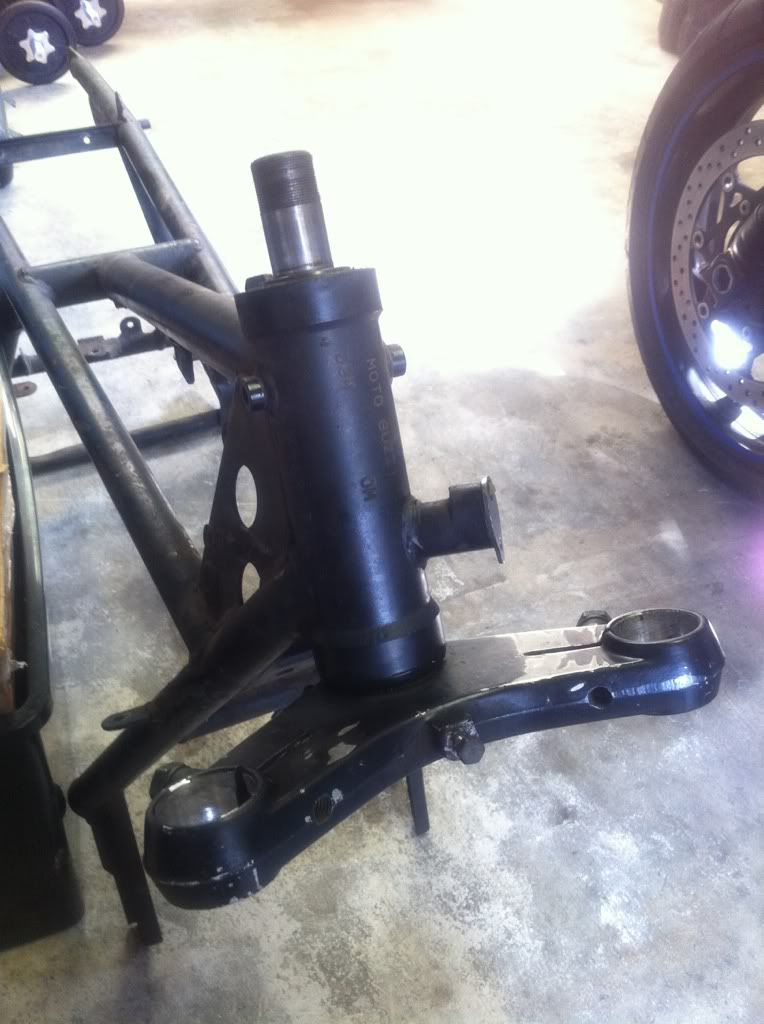
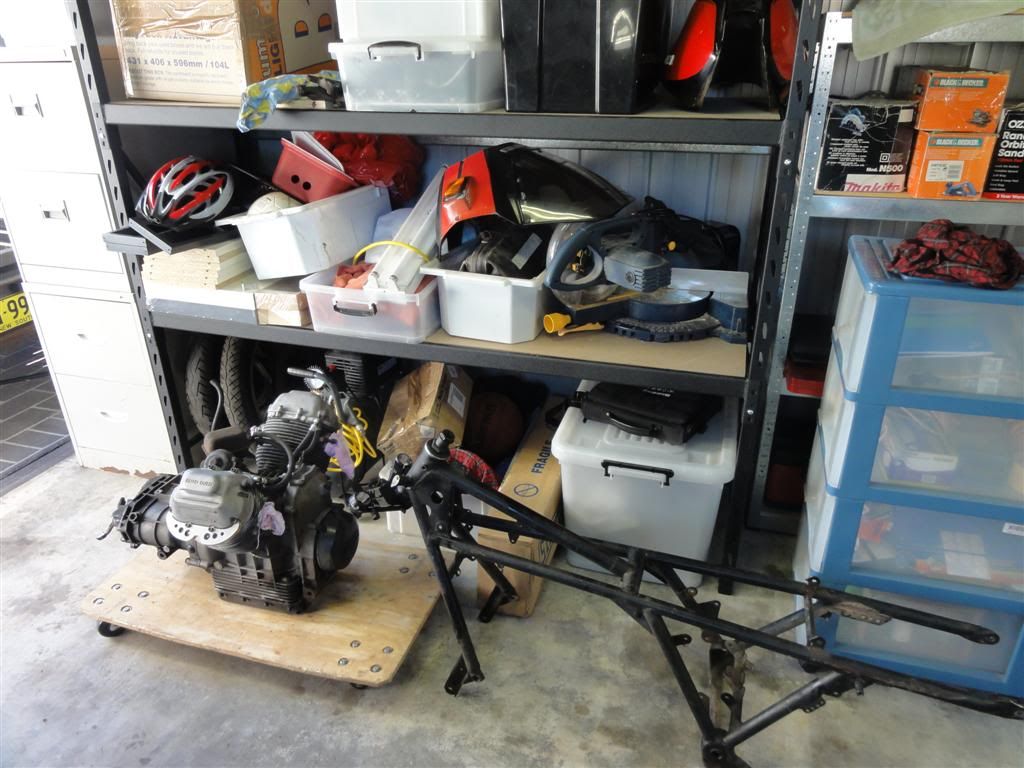
As mentioned in the previous blog entry, the frame, swing-arm and sundry bits and pieces were in for blast and powder-coat at Precision Coating Services in Seven Hills. I was informed that they were ready for pickup and I drove out there on Friday arvo. I was one happy chappy to get them home and see the lovely transormation that had taken place. Everything looked brand new again.
I had a bit of fun removing all the bolts, covers and plugs used to protect areas I did not want coated. It is nice to have the skeleton of the bike back in the shed and ready to get parts bolted back onto. I finally feel like some progress is being made.
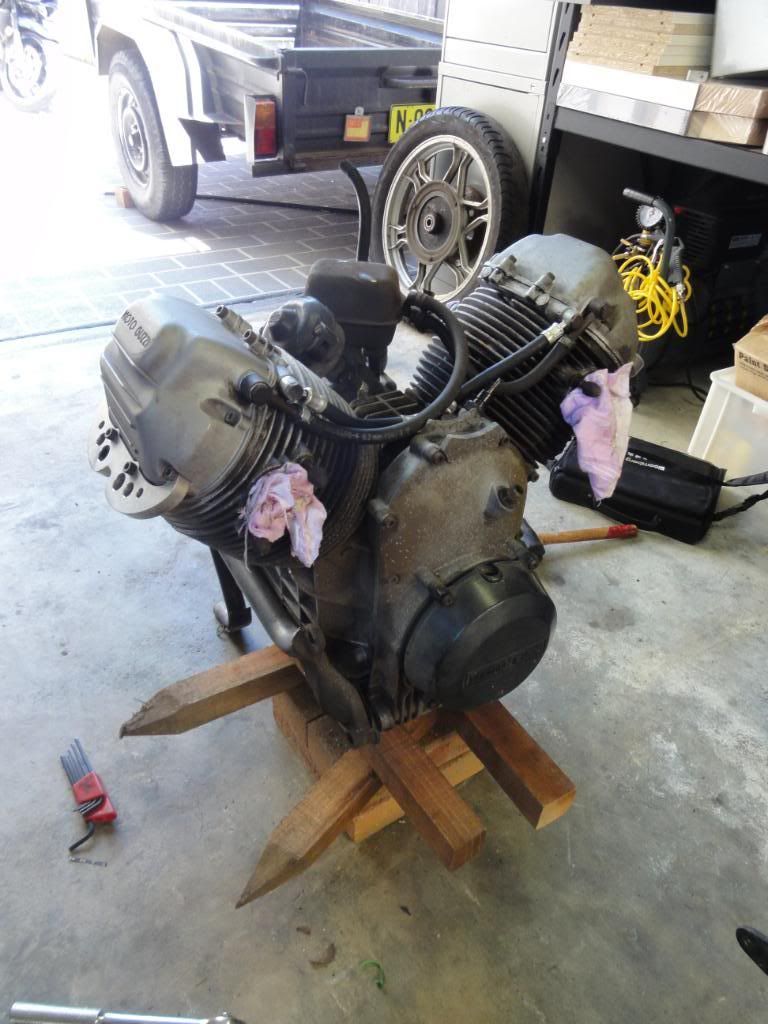
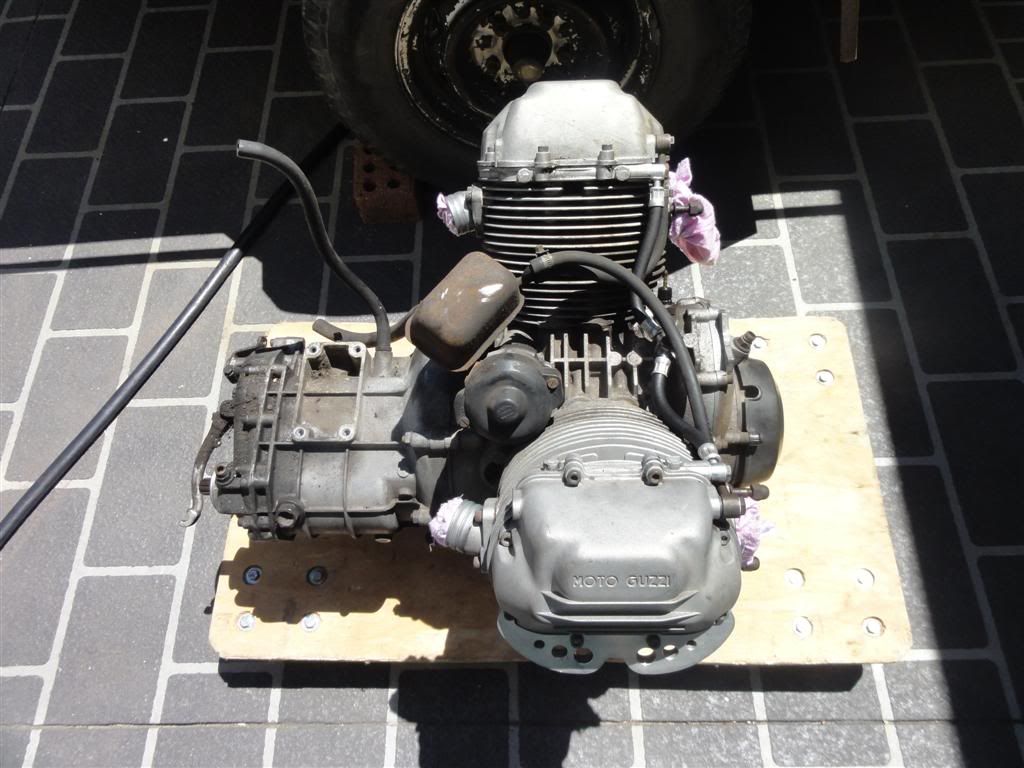
Next job for the weekend was the engine (and gearbox). I had it zero-totalled at 68,000km and it now has 90,500 on the dial, so that's 22,500 km done in a bit over 4 years. There was no way I was gonna pull this baby apart just to be able to have the cases blasted clean. Also, I am making a bike I want to ride, not show, so a clean engine is all I need. Therefore the rest of my spare time in the man-cave was spent de-greasing the engine/gearbox and then scrubbing with various wire brushes.
I am actually quite happy with the result. Sure, it could be better, but after a few weeks, months, years of use, what difference will it make!
That is about it for my weekend's efforts. The only other part to show is the dash setup that I am going to use in place of the big rubber car-type dash the LMII came with originally. I bought it through Stein-Dinse.
So, what's coming up next? I am waiting on the return of the Borrani wheels. Once they are home, I can get them shod, add bearings, carriers, discs etc. Then it will be possible to get the engine and suspension back on the frame... exciting shit, man!
...and one final conundrum: what to do about the mufflers. I am thinking of getting the whole setup HPC coated. However, the mufflers have small rust holes. I am thinking that these could be repaired, then coated? A new set of Lafranconi mufflers can be expen$ive. Any suggestions? Lemme know if you do.
Stay 'Tuned' ...
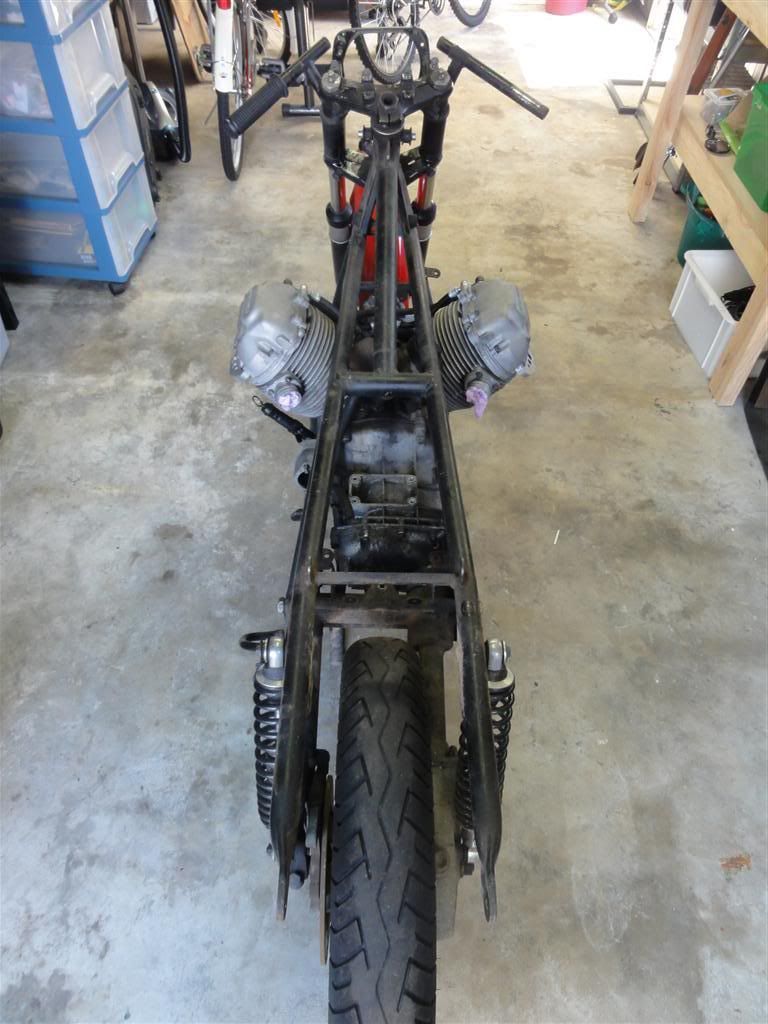
As mentioned in the previous blog entry, the frame, swing-arm and sundry bits and pieces were in for blast and powder-coat at Precision Coating Services in Seven Hills. I was informed that they were ready for pickup and I drove out there on Friday arvo. I was one happy chappy to get them home and see the lovely transormation that had taken place. Everything looked brand new again.
| All the bits back home. All holes still plugged. |
| Close-up of steering-head... nice! |
| Me old mate JB 'Feels Good' about it, too |
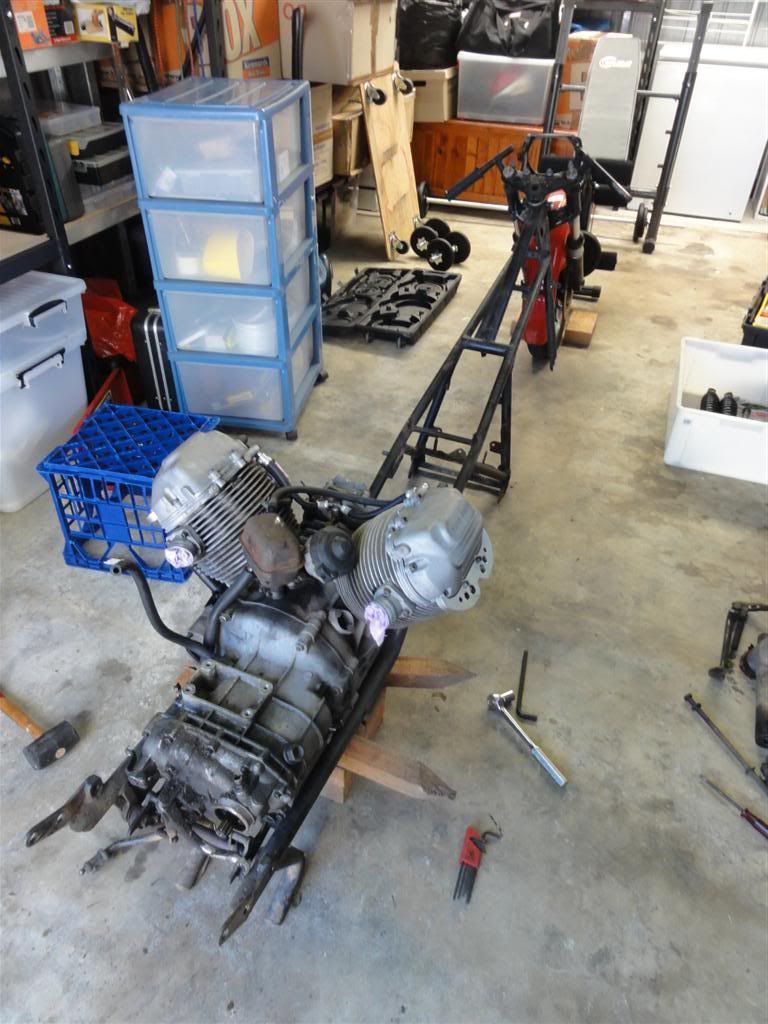
Next job for the weekend was the engine (and gearbox). I had it zero-totalled at 68,000km and it now has 90,500 on the dial, so that's 22,500 km done in a bit over 4 years. There was no way I was gonna pull this baby apart just to be able to have the cases blasted clean. Also, I am making a bike I want to ride, not show, so a clean engine is all I need. Therefore the rest of my spare time in the man-cave was spent de-greasing the engine/gearbox and then scrubbing with various wire brushes.
| Degrease, blow-dry, scrub. Repeat. |
| A huge improvement over what it looked like before. Me happy! |
That is about it for my weekend's efforts. The only other part to show is the dash setup that I am going to use in place of the big rubber car-type dash the LMII came with originally. I bought it through Stein-Dinse.
| Simple and tidy... heaps better than original LMII dash IMHO |
So, what's coming up next? I am waiting on the return of the Borrani wheels. Once they are home, I can get them shod, add bearings, carriers, discs etc. Then it will be possible to get the engine and suspension back on the frame... exciting shit, man!
...and one final conundrum: what to do about the mufflers. I am thinking of getting the whole setup HPC coated. However, the mufflers have small rust holes. I am thinking that these could be repaired, then coated? A new set of Lafranconi mufflers can be expen$ive. Any suggestions? Lemme know if you do.
| Holy mufflers, Batman! |
Stay 'Tuned' ...
Tuesday, June 19, 2012
What's happening? An update:
Okaaaaay... Time for an update on the project.
I have been stumblin' and bumblin' along with a few bits of progress made.
1. The frame and associated bits are at the powder coaters and should be ready for pickup this week. I ended up going with Precision Coating Services at Seven Hills. They are able to do all blasting and prep, as well as the coating and seem to have a pretty good reputation. I will post pics and a report asap I get the stuff back.
2. The Borrani wheels... I deliberated quite a bit over what to do with these as far as preparation for use goes. They were in pretty good nick condition-wise, with nice straight rims and very few nicks. However, there was some surface grit, grime, etc. and the hubs were quite darkened. I am not in any way wanting a concours-type bike, as I wanna ride it! But I do want to start with the wheels in a good (and safe!) condition. That means a pull-down to hub, spokes and rims; something I am confident in doing. HOWEVER, there is no way I am confident in re-assembly. Therefore I decided to bite the bullet and get the job done correctly by the professionals, and as such have shipped them off to Ash's Spoked Wheels in Brisbane. They will be getting a vapour blast for the hubs and a clean and polish for the rims and spokes. They will be ready in a couple of weeks and I will report back here with pics.
3. The fork lowers on the MkII are normally painted black. Over the 30+ years on the road, the paint on these had become chipped , worn and dulled. I decided that the not only was the paint to come off, but they were then to remain bare, as I think this will suit the overall look that I am seeking for the bike. So off to the local hardware store I went. Add one can of stripper and a few hours of elbow grease later: no more paint!
4. Now, for the biggie, as far as applying elbow grease goes: the engine/gearbox.
I am definately not inclined to pulling down a motor just to be able to get some blasting done. I don't need a 'new engine' look that badly, haha! My plan therefore is to just scrub the bastard clean, and stop when I have had enough (which could be very soon!). Here is the setup, after one afternoons's work. It consists of the engine on a stand in a kid's wading pool on a dolly. Thanks to fellow Guzzisti and champion all-round bloke, Marcello Forestieri for the loan of the engine stand. Much appreciated.
Well, that's about it for the moment. I will be back soon to report on the frame and wheels.
Stay 'tuned' ...
I have been stumblin' and bumblin' along with a few bits of progress made.
1. The frame and associated bits are at the powder coaters and should be ready for pickup this week. I ended up going with Precision Coating Services at Seven Hills. They are able to do all blasting and prep, as well as the coating and seem to have a pretty good reputation. I will post pics and a report asap I get the stuff back.
2. The Borrani wheels... I deliberated quite a bit over what to do with these as far as preparation for use goes. They were in pretty good nick condition-wise, with nice straight rims and very few nicks. However, there was some surface grit, grime, etc. and the hubs were quite darkened. I am not in any way wanting a concours-type bike, as I wanna ride it! But I do want to start with the wheels in a good (and safe!) condition. That means a pull-down to hub, spokes and rims; something I am confident in doing. HOWEVER, there is no way I am confident in re-assembly. Therefore I decided to bite the bullet and get the job done correctly by the professionals, and as such have shipped them off to Ash's Spoked Wheels in Brisbane. They will be getting a vapour blast for the hubs and a clean and polish for the rims and spokes. They will be ready in a couple of weeks and I will report back here with pics.
3. The fork lowers on the MkII are normally painted black. Over the 30+ years on the road, the paint on these had become chipped , worn and dulled. I decided that the not only was the paint to come off, but they were then to remain bare, as I think this will suit the overall look that I am seeking for the bike. So off to the local hardware store I went. Add one can of stripper and a few hours of elbow grease later: no more paint!
![]() |
| No more paint, plus added new dust covers |
I am definately not inclined to pulling down a motor just to be able to get some blasting done. I don't need a 'new engine' look that badly, haha! My plan therefore is to just scrub the bastard clean, and stop when I have had enough (which could be very soon!). Here is the setup, after one afternoons's work. It consists of the engine on a stand in a kid's wading pool on a dolly. Thanks to fellow Guzzisti and champion all-round bloke, Marcello Forestieri for the loan of the engine stand. Much appreciated.
![]() |
| Wish me luck! |
Stay 'tuned' ...
Thursday, April 26, 2012
Please Be Seated
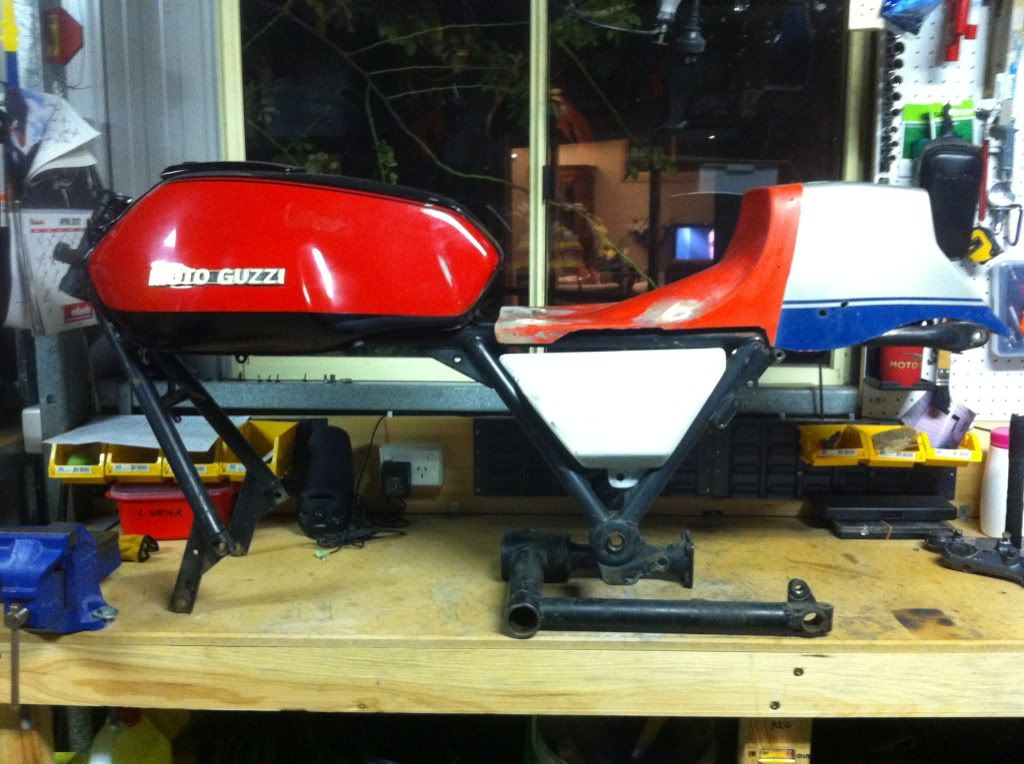
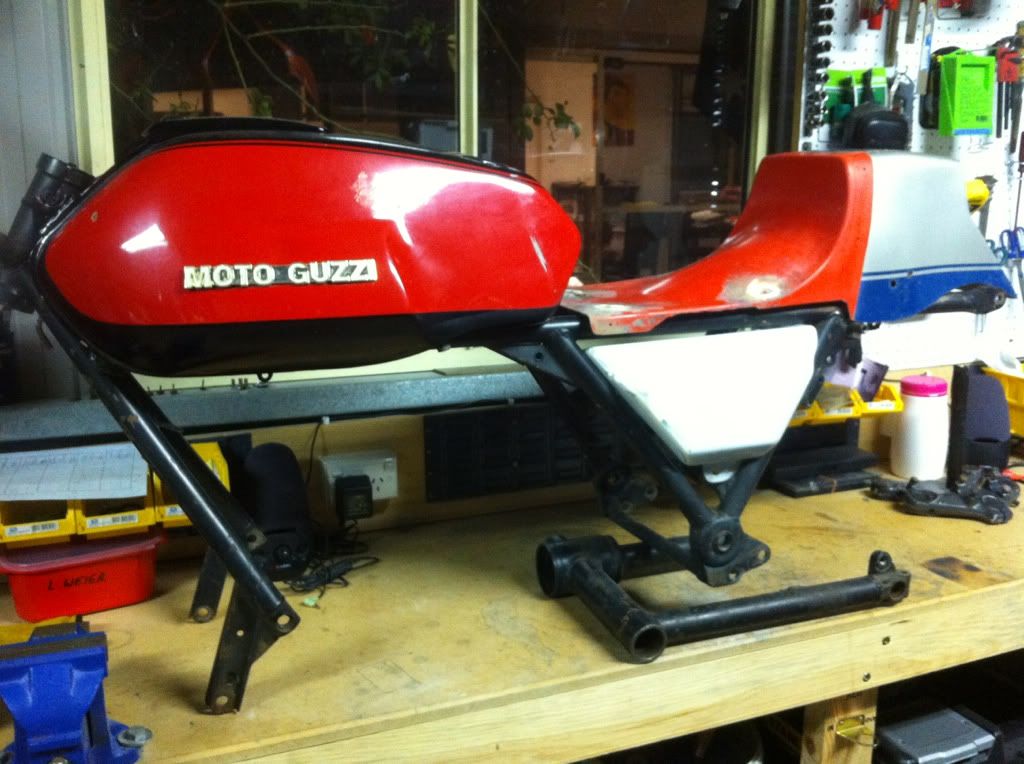
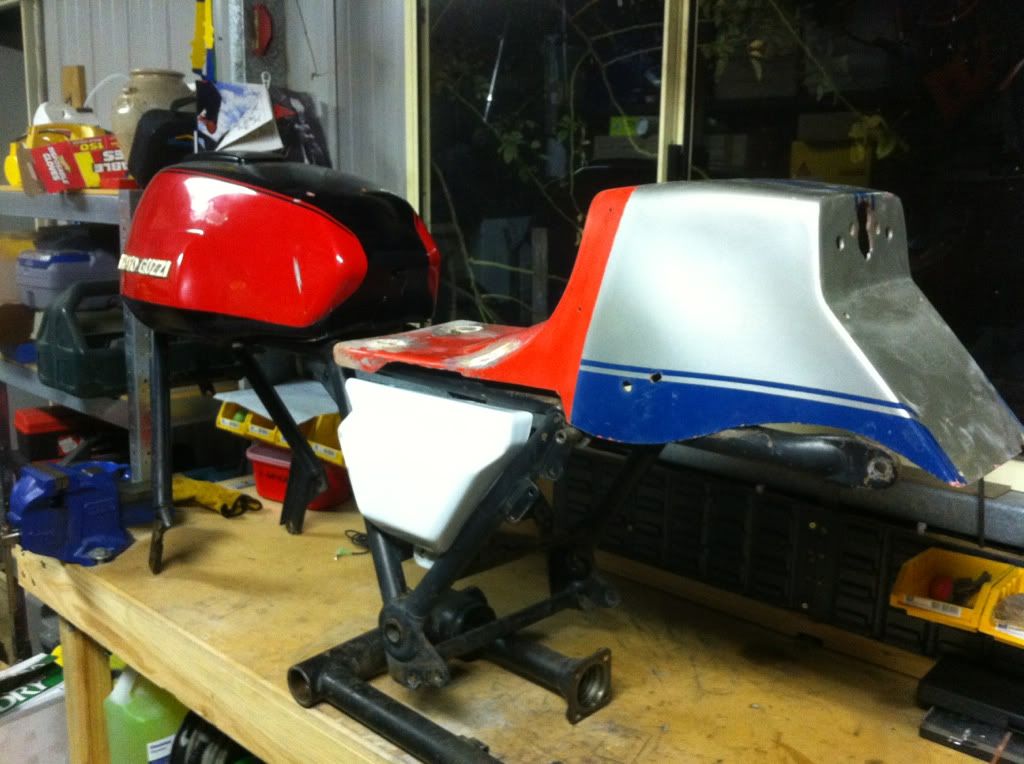
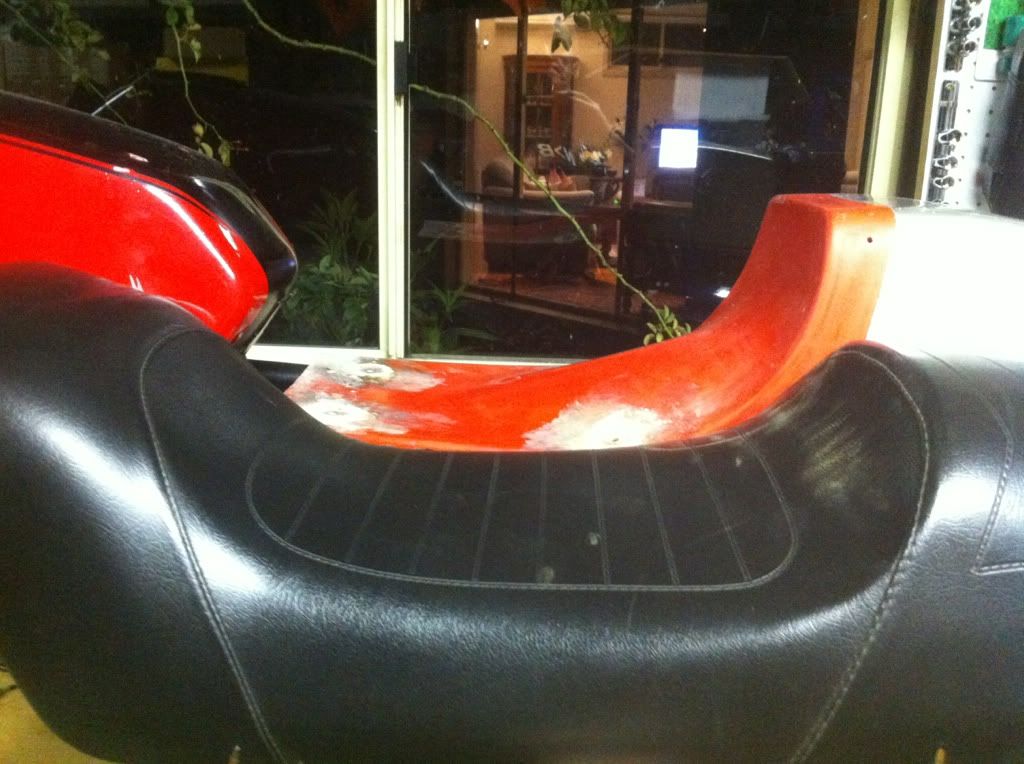
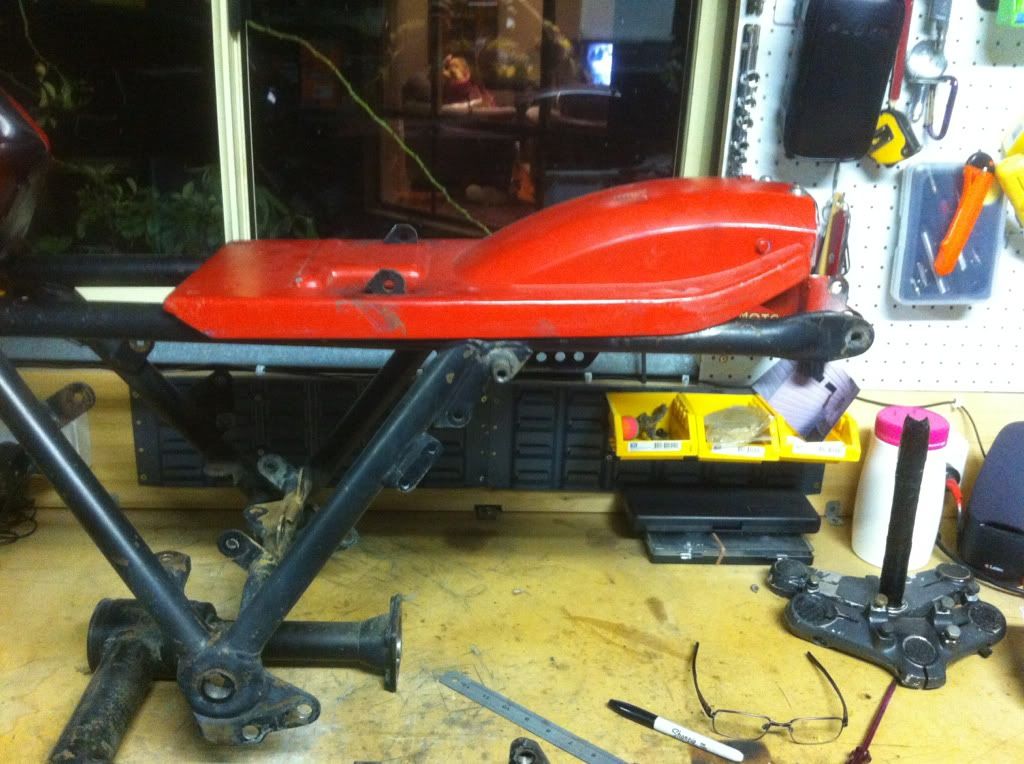
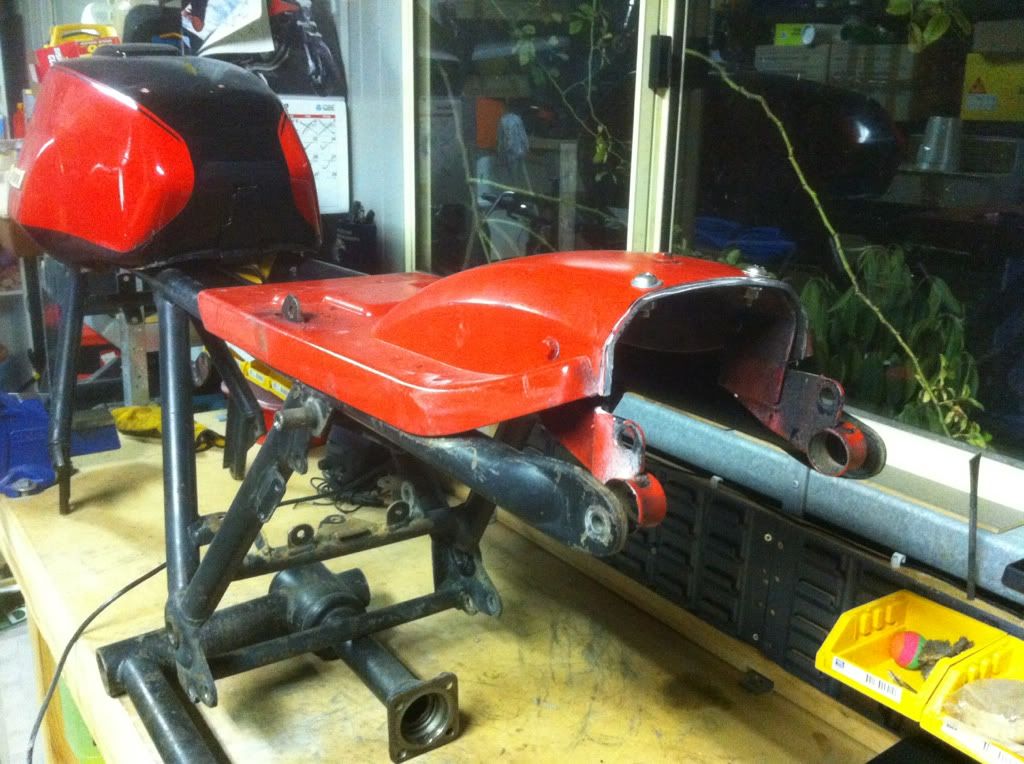
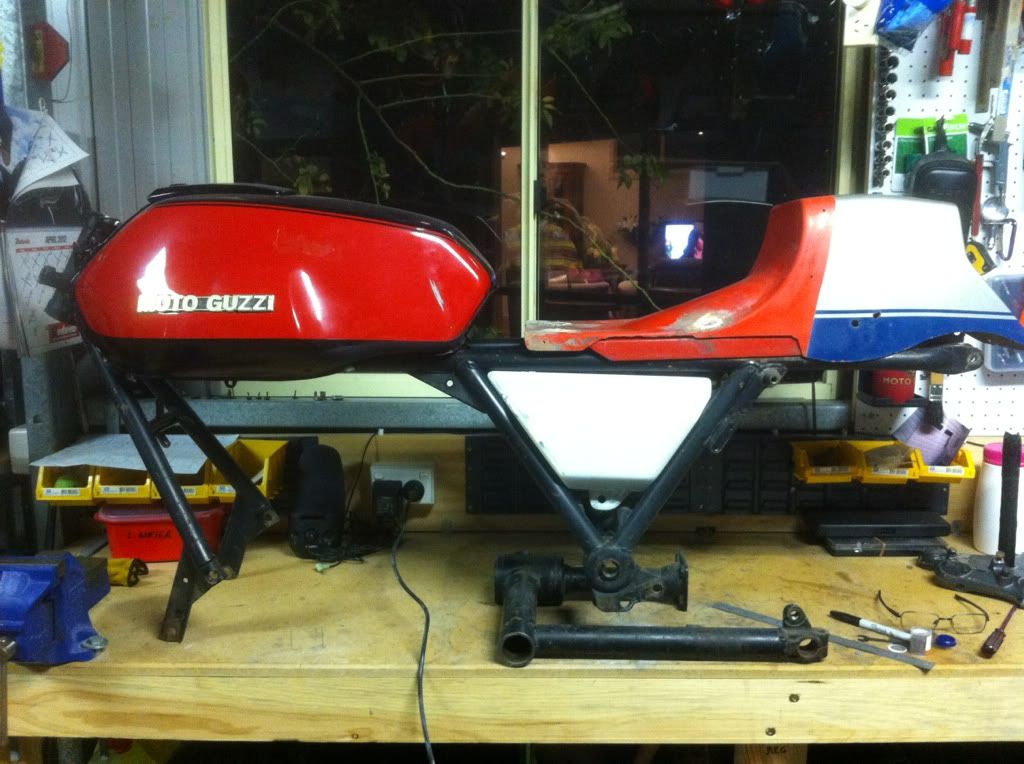
As an update to keep this blog rolling, here is the seat option that I am working on, with much assistance from Brett Rosenthal. Brett had this old seat (made by 'Bertolani' of Italy), which was buried deep under his house. It does have a touch of Laverda SFC about it, although the rear number plate section is a tad different. Who cares, I like it!
I dragged it home and pulled the old upholstery off and cleaned it up a bit. It appears to be a pretty good fit for the bike, and I discovered that it should actually mate quite nicely to my spare original seat/guard base from the LMII. All I will have to do is hack off the mudguard from the original and this one should slip nicely over and mate the remaining part with a minimal amount of fandangling. The advantage of this is that I can use the original rear swivel mount and position lock, which allows the seat to lift for access to the battery etc. Nice!
Here are a few pics. You may also notice the modified / triangulated LM1 / LM2 sidecover that will be used (thanks again to Brett Rosenthal, who makes/sells these covers). The advantage of this cover is that it will allow the use of the standard mounts and keeps the room to conceal the coils and fuses etc. in their original positions. Nice one Brett!
UPDATE
I hacked off the no-longer-required portion of the spare seatbase/guard with the trusty Dremel last night. Pics of the result:
UPDATE on the frame:
I am back to choosing to powdercoat and am now plugging holes,threads in preparation for blasting and coating. The trade-off is that I will still be doing the painting of the tank/seat/fairing myself.
Stay 'tuned' ...
I dragged it home and pulled the old upholstery off and cleaned it up a bit. It appears to be a pretty good fit for the bike, and I discovered that it should actually mate quite nicely to my spare original seat/guard base from the LMII. All I will have to do is hack off the mudguard from the original and this one should slip nicely over and mate the remaining part with a minimal amount of fandangling. The advantage of this is that I can use the original rear swivel mount and position lock, which allows the seat to lift for access to the battery etc. Nice!
Here are a few pics. You may also notice the modified / triangulated LM1 / LM2 sidecover that will be used (thanks again to Brett Rosenthal, who makes/sells these covers). The advantage of this cover is that it will allow the use of the standard mounts and keeps the room to conceal the coils and fuses etc. in their original positions. Nice one Brett!
| Side-by side comparison with previous seat shows seating position will be similar |
Hacking now completed!
I hacked off the no-longer-required portion of the spare seatbase/guard with the trusty Dremel last night. Pics of the result:
| Bye-bye guard! |
| Tail docked |
| This just might work! |
UPDATE on the frame:
I am back to choosing to powdercoat and am now plugging holes,threads in preparation for blasting and coating. The trade-off is that I will still be doing the painting of the tank/seat/fairing myself.
Stay 'tuned' ...
Thursday, March 29, 2012
Back to the Grind
Before final prep of the frame for paint or powder-coat, I have a few little jobs to sort out, so I tackled two of them tonight.
Firstly, I never had a key for the steering lock. I discovered that Stein-Dinse sell a replacement lock with keys for less than it would cost me to have a locksmith pick the lock and make a key. So out came the drill and a few different sized bits and I drilled the old one out and cleaned up the shavings. Easy-peasy!
The second job was to remove the broken steering stop from the frame so that I can weld a new piece in there. The replacement piece is not yet made, that's the next job on the list (well, after I buy a cheap arc welder, that is. haha!).
It is not the easiest location to get in and remove something, that's for sure:
The snap-off is the result of a low-side fall. I imagine it is a fairly common problem in older Guzzi's. I have been looking forward to including this fix, as it has been a real pain without it when using clip-on bars.
As access is tight, out came the trusty Dremel tool, which I used to cut the piece out and then grind down the excess weld.
...all ready to receive new piece. Stay tuned to see how that turns out!
UPDATE 6 April 2012:
Well, I bit the bullet and picked up a little second-hand AC arc welder off of eBay. After a bit of farting about on some practice bits of mild steel, I attacked the job and surprisingly managed to do the business on the steering stop. Not the prettiest I admit, but I think it will do the job. My thanks to Rod Yeomans, Graeme Wilson, Mark Glanfield and Charles Anstis from the AIGOR list for their advice, and also a special thanks to Rob Anderson for offering to do the job for me if my effort did not work out (which was certainly on the cards!).
Next step: Quit buggering around and get the frame finished so I can start the re-build!
Stay 'tuned'...
Firstly, I never had a key for the steering lock. I discovered that Stein-Dinse sell a replacement lock with keys for less than it would cost me to have a locksmith pick the lock and make a key. So out came the drill and a few different sized bits and I drilled the old one out and cleaned up the shavings. Easy-peasy!
| Started off small and worked up |
| Eventually... voila! |
The second job was to remove the broken steering stop from the frame so that I can weld a new piece in there. The replacement piece is not yet made, that's the next job on the list (well, after I buy a cheap arc welder, that is. haha!).
It is not the easiest location to get in and remove something, that's for sure:
| That's a 30+ y/o frame there, folks |
As access is tight, out came the trusty Dremel tool, which I used to cut the piece out and then grind down the excess weld.
| Cut |
| Grind, baby, grind! |
| Done! |
...all ready to receive new piece. Stay tuned to see how that turns out!
UPDATE 6 April 2012:
Well, I bit the bullet and picked up a little second-hand AC arc welder off of eBay. After a bit of farting about on some practice bits of mild steel, I attacked the job and surprisingly managed to do the business on the steering stop. Not the prettiest I admit, but I think it will do the job. My thanks to Rod Yeomans, Graeme Wilson, Mark Glanfield and Charles Anstis from the AIGOR list for their advice, and also a special thanks to Rob Anderson for offering to do the job for me if my effort did not work out (which was certainly on the cards!).
| 'Fingers crossed' |
Next step: Quit buggering around and get the frame finished so I can start the re-build!
Stay 'tuned'...
Saturday, March 3, 2012
Back on Track
Well after a short hiatus over Christmas and New Year, I hit a snag with suspension of my licence due to a slight over-exuberance 50km south of Thredbo... major detune!! Anyhoo, we are back on track now and doing preparation work for finishing of frame and associated bits.
I had a great visit from well-known Guzzi enthusiast Brett Rosenthal, who had been working on a set of (more triangular looking) side covers for the project. He also brought over his special tool for pulling the lower bearing off the triple tree. Worked a treat! Thanks Brett for the help and the mountain of other advice you have provided.
I have done some hard thinking and have come to the decision that I will be painting the frame and not powder-coat. This is purely a personal decision as I want to do as much of the job as possible and this will allow me to work to my own time-frame and give me more of a feeling of personal achievement. I realise that I may stuff it up, and that it may not look as good, but the personal satisfaction will be there. I have never painted before, so I will be learning a new skill, so that is a bonus I will get from the project.
I have also decided to do the whole paint job for the bike. Ambitious? Yes. But I am not really concerned to get a 'concours' look from this, just a bike with a different look and a feeling of having done it (mostly) by myself. So now I am in the process of putting all the bits/tools together to start on the paint! I also am in the process of picking the brain of a Queensland Guzzi lover and world traveller, Rod Yeomans, who has been fantastic in giving me the benefit of his experience plus many tips to help guide me. Rod has a couple of great blog entries on his Guzzi travels through the USA and Europe over at Squadra Guzzista website as internet persona 'Morizzi'. Check them out and dare to dream!!!
Finally an honorary mention to Peter Clare from the AIGOR mailing list who came to my rescue and supplied a spacer for the rear Borrani wheel that I was having difficultly finding. AWESOME support from the Guzzi community. Thanks Peter, I owe you one.
And on it goes...
| The associate bits |
I had a great visit from well-known Guzzi enthusiast Brett Rosenthal, who had been working on a set of (more triangular looking) side covers for the project. He also brought over his special tool for pulling the lower bearing off the triple tree. Worked a treat! Thanks Brett for the help and the mountain of other advice you have provided.
| Brett on the job |
| Close-up of Brett's tool |
I have done some hard thinking and have come to the decision that I will be painting the frame and not powder-coat. This is purely a personal decision as I want to do as much of the job as possible and this will allow me to work to my own time-frame and give me more of a feeling of personal achievement. I realise that I may stuff it up, and that it may not look as good, but the personal satisfaction will be there. I have never painted before, so I will be learning a new skill, so that is a bonus I will get from the project.
I have also decided to do the whole paint job for the bike. Ambitious? Yes. But I am not really concerned to get a 'concours' look from this, just a bike with a different look and a feeling of having done it (mostly) by myself. So now I am in the process of putting all the bits/tools together to start on the paint! I also am in the process of picking the brain of a Queensland Guzzi lover and world traveller, Rod Yeomans, who has been fantastic in giving me the benefit of his experience plus many tips to help guide me. Rod has a couple of great blog entries on his Guzzi travels through the USA and Europe over at Squadra Guzzista website as internet persona 'Morizzi'. Check them out and dare to dream!!!
Finally an honorary mention to Peter Clare from the AIGOR mailing list who came to my rescue and supplied a spacer for the rear Borrani wheel that I was having difficultly finding. AWESOME support from the Guzzi community. Thanks Peter, I owe you one.
And on it goes...
Monday, December 5, 2011
Tear-down completed
I left you a week ago in my last blog entry with the bike in the garage and the pipes and carbs off the motor.
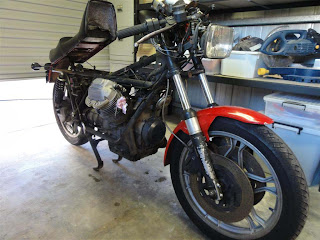
Well, I was still champing at the bit to get more done, so spent my nights during the week getting the bike to the stage where I could pull the motor out on Saturday.
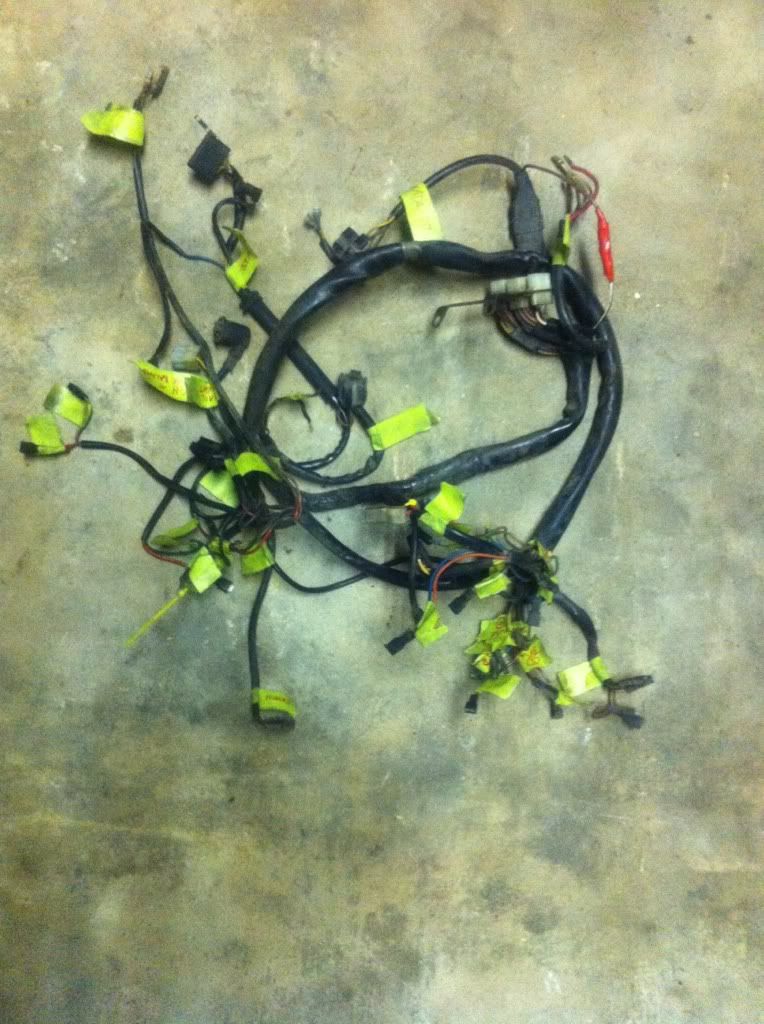
Lots of sleep was lost and lots of fun was had during this process. Surely the most fun was getting the wiring harness disconnected and off the frame. Oh boy, talk about a lot of connections. With a view to the reconnection process somewhere down the track, I dutifully labelled all connections with a roll of marking tape and my trusty Sharpie. It came off looking like this. Yikes!
Most of the wiring looks exactly as you would expect it to, after 31 years of being pinned to a motorcycle that has travelled many kilometers and stood in the weather for many years. I have some thinking to do, as to whether I will rewire completely or re-do any of the bad looking connectors etc.
Whatever the decision, some changes will be required, or at least a connecting sub-harness will have to be made to accomodate the instrument lights etc., as the LMII has a small circuit board for these and as part of my project the original light and instrument setup is being changed. All good fun!
Another thing that amazed me was just how many small parts are clamped to the frame. Keeping track of these is also a challenge, so far met by the liberal use of snap-lock bags. All parts are fairly grubby, so my next task will be to attack the contents of each bag and clean up the contents of all grime.
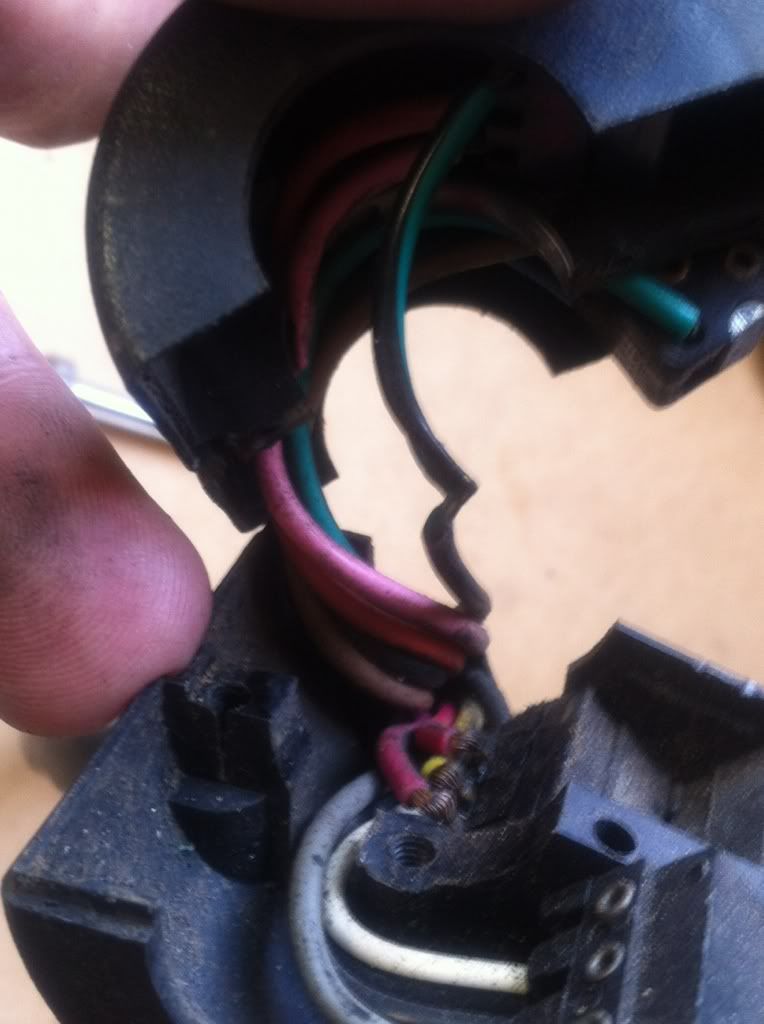
Late one evening I attempted to remove the swithgear from both clip-ons. Do you think I could work out how to release the switches? Where the hell were the screws that clamped them to the bars? For the life of me I could not make it out. The next morning I put out a mayday call to the ever-helpful AIGOR mailing list and was rather embarrassed to learn that there are two normal screws and one grub screw in each switch, just where you would expect them to be. My problem was that I was expecting large screws, when in fact they are quite small and buried underneath. It is amazing how the brain can trick you into not seeing something that it refused to accept could be there. Anyhoo, that's my excuse and I am sticking to it! When I opened the switches, a further surprise awaited as I discovered that the wires had been severely pinched at some time in the past. I would not put it past being the fault of Luigi on the original assembly line. There is a lot to be said for multi-strand wire, that's for sure.
The next big task was to get the brake system off. The contents of the reservoir for the rear brake pedal left a lot to be desired. The fluid was filthy. Not a good look. Everything came off ok although I can't say that I am looking forward to the re-installation of the brakes. Another mystery element for me, so it will be a learning experience.
![]() |
| Ready for more fun |
Lots of sleep was lost and lots of fun was had during this process. Surely the most fun was getting the wiring harness disconnected and off the frame. Oh boy, talk about a lot of connections. With a view to the reconnection process somewhere down the track, I dutifully labelled all connections with a roll of marking tape and my trusty Sharpie. It came off looking like this. Yikes!
| How do you like your spaghetti ? |
Most of the wiring looks exactly as you would expect it to, after 31 years of being pinned to a motorcycle that has travelled many kilometers and stood in the weather for many years. I have some thinking to do, as to whether I will rewire completely or re-do any of the bad looking connectors etc.
Whatever the decision, some changes will be required, or at least a connecting sub-harness will have to be made to accomodate the instrument lights etc., as the LMII has a small circuit board for these and as part of my project the original light and instrument setup is being changed. All good fun!
Another thing that amazed me was just how many small parts are clamped to the frame. Keeping track of these is also a challenge, so far met by the liberal use of snap-lock bags. All parts are fairly grubby, so my next task will be to attack the contents of each bag and clean up the contents of all grime.
Late one evening I attempted to remove the swithgear from both clip-ons. Do you think I could work out how to release the switches? Where the hell were the screws that clamped them to the bars? For the life of me I could not make it out. The next morning I put out a mayday call to the ever-helpful AIGOR mailing list and was rather embarrassed to learn that there are two normal screws and one grub screw in each switch, just where you would expect them to be. My problem was that I was expecting large screws, when in fact they are quite small and buried underneath. It is amazing how the brain can trick you into not seeing something that it refused to accept could be there. Anyhoo, that's my excuse and I am sticking to it! When I opened the switches, a further surprise awaited as I discovered that the wires had been severely pinched at some time in the past. I would not put it past being the fault of Luigi on the original assembly line. There is a lot to be said for multi-strand wire, that's for sure.
| Make sure you screw that bastard down tight, Luigi |
| Yes boss! |
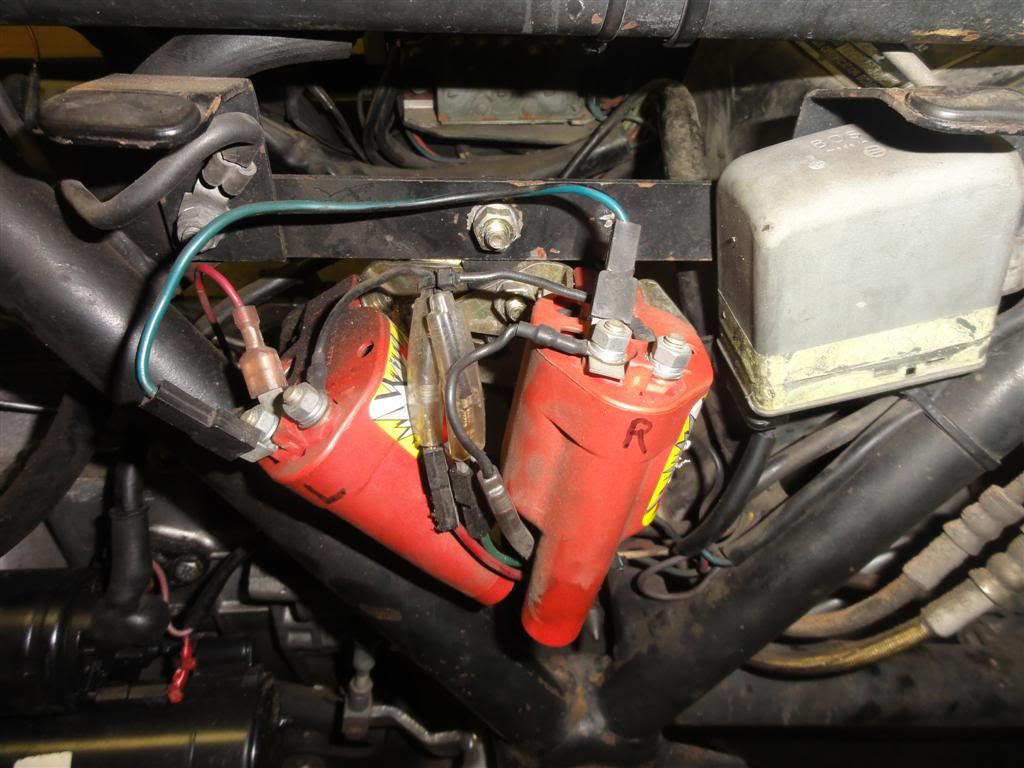
The re-build will also allow me to build and install a better mounting bracket for my GT40 coils that I installed after the failure of the original coils. My hurried effort, while effective, was not what you would call a work of art, hehehe.
| Not much room |
The next big task was to get the brake system off. The contents of the reservoir for the rear brake pedal left a lot to be desired. The fluid was filthy. Not a good look. Everything came off ok although I can't say that I am looking forward to the re-installation of the brakes. Another mystery element for me, so it will be a learning experience.
As it came to Saturday morning, it was down to brass tacks and the bare bike stood ready before me, awaiting the coup de grĂ¢ce. The execution was not to be all that swift as I met one or two sticking points along the way.
| Ready for the final blows |
I am a firm believer in discretion being the better part of valour in situations such as this and fired another query off to AIGOR, hoping that they were not already getting sick of me. I was happy to receive a lot of advice on how to proceed, most of it confirming my own thoughts, so that was also good for my confidence.
I won't bore you with too many details, but suffice to say, I managed to remove rear wheel, suspension and swingarm. I then disconnected the subframe and walked the main frame and front end off with no problems at all.
| Getting close now |
That was a nice feeling, but there was no time to waste. I decided to do away with the front end before attacking the engine/rails/centre-stand section, and this is where I hit a snag. The fork tubes seemed to be locked solid into the yokes. No amount of WD40 or manly twisting attemps would release them from the vice-like grip of those wicked yokes. Arrrggghhhhh!!!! I re-examined my copy of the parts manual and deduced that I had missed nothing and that they were simply frozen to the yokes through being clamped there for eons. Oh well, out came the mallett...
Whack, whack, whack. There was movement at the station. Yay! I managed to get the tops of both tubes down to yoke level, then needed to use a wooden drift to bang then down out of the top yoke. Once free from there, it was more manly twisting to get them all the way down and out. With lock nut and adjusting nut removed, the top yoke then came off no problems at all, as did the clip-ons and the never-to-be-used-again-light-fitting, leaving the bottom yoke somehow firmly embedded in the steering head. It seemed to have taken a leaf out of the fork tube's book and would not budge. Hmmm.... it should fall straight out, right? Yeah, riiiight... Being a huge chicken, and even though I believed that a good belting is what it deserved, I decided to consult AIGOR again later to get a confirmation. So leave that as-is and lets get to the engine.
| This ain't no yoke! |
Suffice to say, AIGOR came to the rescue once again and several whacks of a hammer onto the top, using a block of wood as an intermediary and away she came, dropping like Marie Antoinette's head into a waiting box. The top bearing lifted out of the frame, but an inspection of the lower one found it firmly pressed onto the lower section of the yoke column. I have had advice that it can be left there if in ok condition, just regrease and refit as one with the yoke. However, I do want to re-paint/powdercoat (decision not yet made), so it will have to come off. One Aigorite, Brett, has constructed a puller to remove this bearing, so I shall be borrowing that and will take pics for this blog.
So after a week of fun and not much sleep, all that lay before me was the engine on blocks, still attached to rails and centre stand.
| Yes, I know it is grotty... |
There were to be no further problems and simple removal of bolts and a bit of jiggling saw the engine free from the frame. Being a job for two, father and son (where did he come from?) lifted it onto an awaiting dolly and it was wheeled out into the sunshine to pose for a posterity picture.
Then it was wheeled back inside to await further instructions!
That just about brings us up to date. Next on the horizon is to get the bearing off of the yoke, and also the swingarm bearings out. The forks will need dismantling to allow the lowers to be re-coated. I will be spending some time in cleaning up parts to remove the years of oil, grease and grime. Decisions will have to be made on whether to paint or powdercoat the relevant parts.
Yeah, lots to do... but what fun it is!
| Engine out. Please clean me. |
| Awaiting further work (note: lower yoke now successfully removed!) |
Stay 'tuned' for more...
Subscribe to:
Posts (Atom)